Welcome

This blog started off sharing my bridal business sewing projects and is now a hodgepodge of unique and fun things I have created over the years.

Hope your creative side is inspired!


Showing posts with label bustle. Show all posts

Wednesday, January 12, 2011

A Bustle of Layers


A taffeta dress with layers and layers.  To bustle this dress I used the French Under Bustle method with color coded ribbons.  When the dress was bustled you didn't even notice all the extra layers.  The layers seamlessly blended so nicely.

Tuesday, August 17, 2010

Double Chiffon Bustle

This dress was lined in bridal satin with a layer of white chiffon on top.  The back had a lace up closer.  When altering the dress this bride requested straps.  I reversed the lacing and laced from the bottom up, placed two loops on the front of the bodice for the lacing to go through and then pulled the straps back through to the back to create straps.  


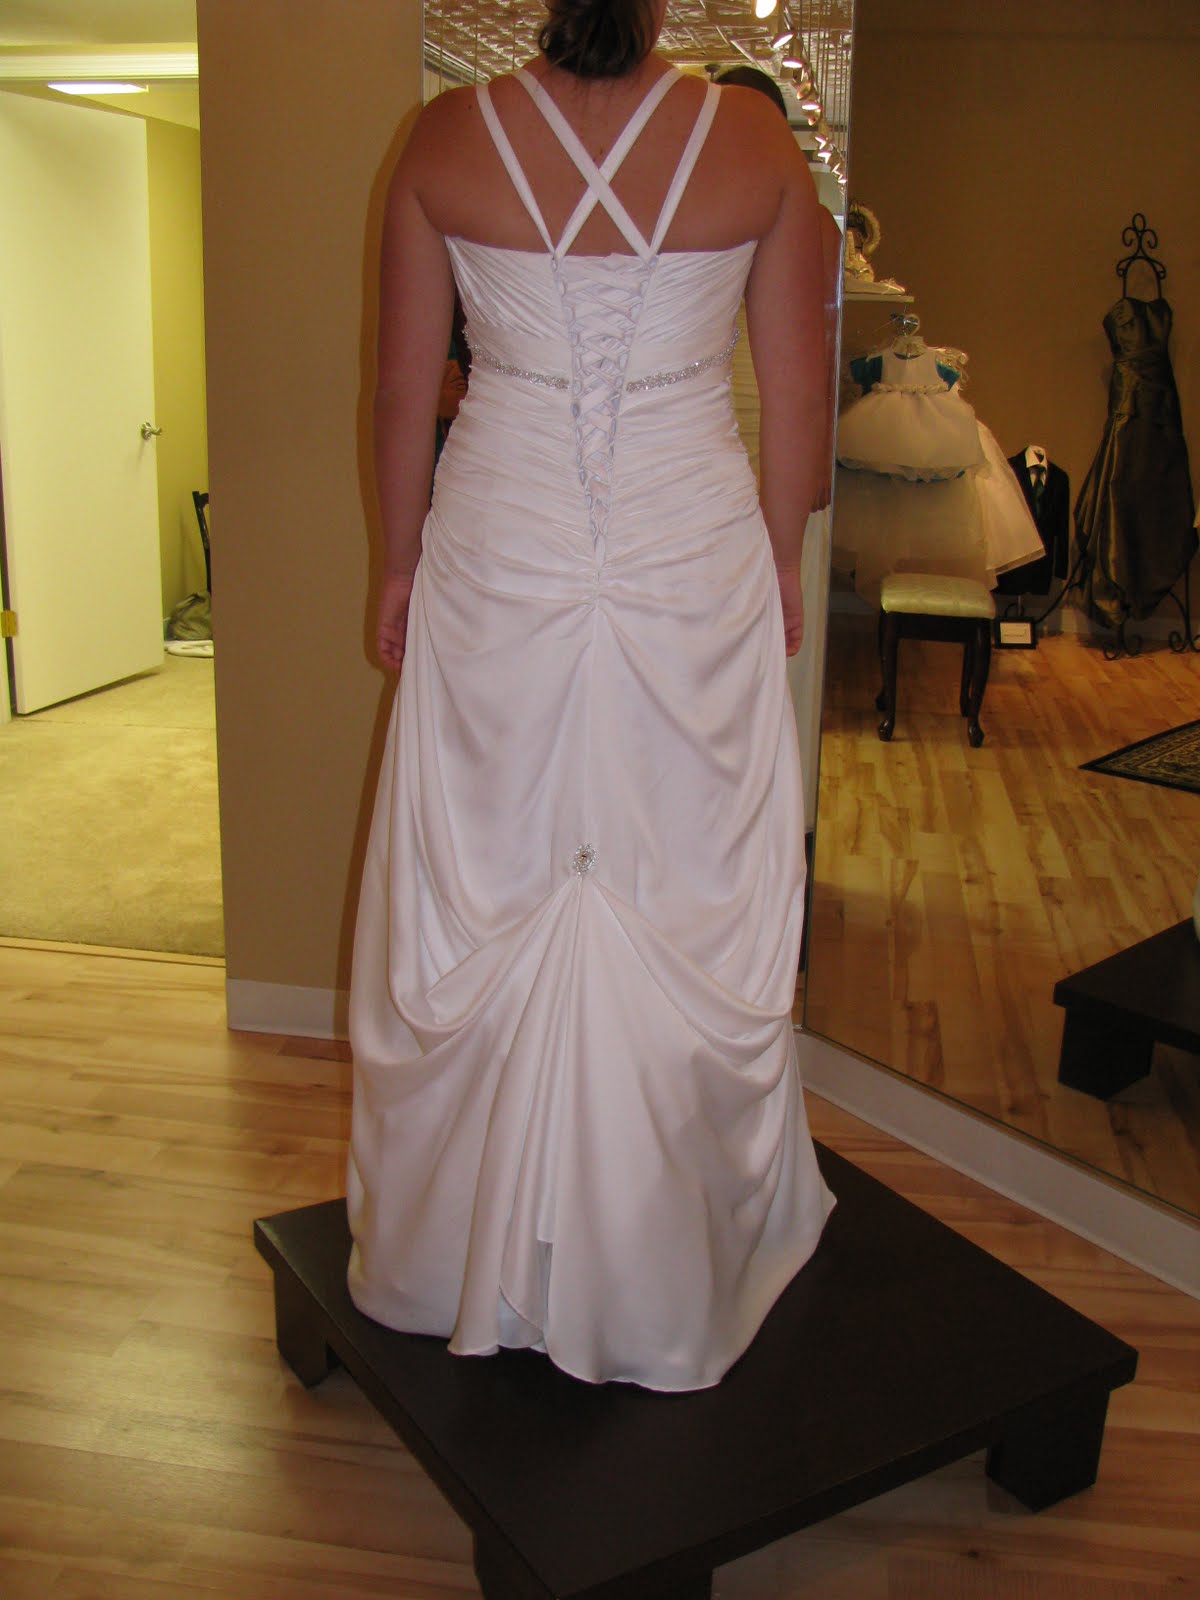
To bustle this dress it required a double combination bustle.   Nine loops were sewn under the dress and a ribbon was attached under at the beaded embellishment that was placed on the center back of the dress - the ribbon was then threaded through the loops and tied creating a french bustle.  Then two simple thread loops were made and an over bustle was created hooking the loops to a hook just under the embellishment to give this bustle a  Greek look.

Monday, August 16, 2010

Bubble Dress Under - Bustle

A mermaid bubble pick up style dress with a train.
A bustle was created using color coded ribbons and nylon rings.  I used the under bustle technique folding the dress under and into the lining of the back.  This dress required 5 bustle points.

Wednesday, April 28, 2010

A Tufted Bustle


This Bride had lot of ideas to make this dress uniquely hers. We had a champagne colored sash and used lace from her grandmother's and mother's wedding gowns to create accent and a focal point on the front of this taffeta tufted gown.


The back of this dress had pick ups spread through out the trane. I used the French Bustle method to create an elegant and princess look for this bride. I used 5 bustle points to create the finished look. The Champagne colored sash is secured by two tiny doll buttons and crocheted loops that were created on the back side of the sash to keep it in place.

Tuesday, April 27, 2010

A Traditional Bustle with 3 Pts.


An elegant and simple dress adorned with intricate embroidery work on the top layer of organza. The bride was determined to not loose any of the detail when the dress was bustled.


We opted to bustle the dress using a traditional bustle over top of the dress. Three satin covered buttons were sewn at the waist and thread loops were crocheted into the trane of the dress to create this traditional look.

Monday, April 26, 2010

A Bustle of Silk Layered Pleats


After working on this dress I reworked the original bustle by creating a double bustle with 2 sets of ribbons and nylon rings.


This bride requested a modesty piece be created for the back of her dress. I used some of the fabric from a layer I removed from the front of the dress when hemming it. You might see a safety pin at the center of the lacing string. That is to help keep the string in the center when lacing up the back of the dress. Once the dress is laced then the pin can be removed and the ties are exactly even.


When creating this bustle I used a double french bustle method.


This picture shows the first set of bustle points tied.


This picture shows the second set of bustle points tied.


The finished bustle. Just beautiful and perfectly spaced.

Saturday, April 24, 2010

A Bustle of Lace & Layers


Layers and Layers of Silk Lace.
The bride requested I add the champagne colored sash to the bodice for some color and emphasis.


I used the french bustle technique to create this Victorian style bustle. 5 Bustle points were needed to create the finished look.
Plastic nylon rings and colored ribbons make achieving the bustle simple for anyone to create.

Monday, March 29, 2010

A Unique Bustle of layers


With a single row of 5 bustles.


With a double row of 3 bustles or 6 bustle points. The end result looks so much better.


Un-Bustled


A variation of the french bustle was used to created the finished bustle. Nylon rings with color coded ribbons were used to create the finished bustle.

Friday, January 29, 2010

A Bustle on a Gown with Pick-ups

When bustling this dress I used the french bustle method. I used nylon rings and color coded ribbons under the dress train. There were a total of 7 bustle points used to complete this look. The back of the dress bustled stays just as beautiful as the front complimenting the lines created by the tucks on the front of the gown. Once this brides dress is bustled she will be ready to dance the night away.
Bustling a wedding gown correctly is critical to helping the bride stay comfortable in her dress all night - especially if there is a wedding dance planned. The most important parts to creating a bustle is getting the dress completely off of the floor and making it appear as though it is a floor length dress.

Thursday, October 29, 2009

A French Bustle


Altering wedding gowns is an art for me. Bustling the dress is one of my favorite things to do. It is usually the last sewing the needs to be done on a dress before steaming. The bustle shown in this picture is a french bustle. It was accomplished by using plastic nylon rings and color coded ribbons sewn under the dress. When I create a bustle for a bride I always try to keep it simple. It is always my goal to fashion a bustle that anyone can recreate on the bride's wedding day. When bustling a dress it important to make the bustle appear to be part of the dress with an even hem line and nothing hanging out or dragging on the ground. A well done bustle is important so the bride isn't tripping on her gown during the wedding dance. The back of the dress is also a part of the dress that is photographed during the first dance when the bride is dancing with her new groom. A sloppy bustle can equal a sloppy picture.

Wednesday, October 21, 2009

A Traditional Bustle

I do lots of bustles for brides. Creating unique and beautiful bustles is one of my favorite things to do. I love to help the brides feel like Cinderella.

This dress was absolutely breath taking and princess-like.

Most of the lace train was bustled under the opening in the back using hooks and thread loops sewn onto the train. The loops were hidden in the lace and made with tatting thread. Two small fabric covered satin buttons on top at the waistline were used to bring up the sides. This bustle took 7 points costing the bride $70.

All she needed was a veil, her glass slippers and her prince charming.